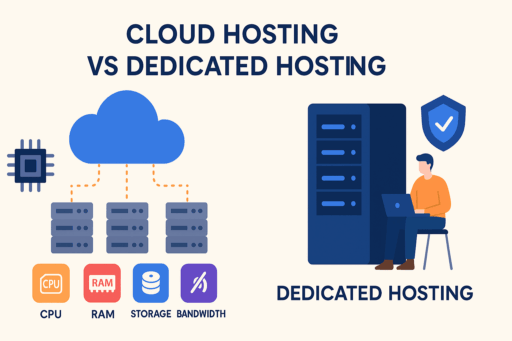
When it comes to offering you control and performance, dedicated servers are your best option in the hosting industry. With shared hosting, the resources are used redundantly. With VPS hosting, the resources are partitioned and shared at a virtualization layer. With a dedicated server, you have an entire physical machine at your disposal for exclusive use. Thus, you fully control all elements of the hardware, the operating system, and the configurations.
So, why should you choose a dedicated server over other hosting types? The main reasons are power, flexibility, and security. Dedicated servers can handle high-traffic websites, resource-intensive applications, online gaming, AI/ML workloads, and enterprise-level data storage. They also offer stronger security since you’re not sharing the server with other users, minimizing risks of performance slowdowns or vulnerabilities from “noisy neighbors.”
This guide will walk you through the entire setup process for a dedicated server, including how to select appropriate server hardware, install the server OS, secure the system, set up necessary services, and provide long-term server maintenance to ensure optimal performance. This will ultimately give you the confidence and knowledge to set up and manage a dedicated server.
Understanding Dedicated Servers
Before getting into configuration, it’s best to understand what dedicated servers actually are and what makes them different from other forms of hosting. Simply put, a dedicated server is a physical machine, and that machine is yours. Unlike shared hosting and VPS, where everyone is competing for a slice of the hardware, a dedicated server gives you complete access to the machine, meaning you don’t have to compete for any processing power, memory, or bandwidth.
What Makes Them Different?
The most significant difference is ownership. In a dedicated server, all of the possible resources can be yours to control and tweak, giving you a level of power and reliability that is simply not possible in a shared or other virtual hosting setup.
Dedicated Resources vs. Shared Hosting
With shared hosting, dozens or hundreds of sites can be running from the same machine, and that will have an impact on performance. VPS hosting improves on this by giving each user a virtualized slice of resources, but you’re still technically sharing the underlying hardware. With dedicated servers, you don’t have to share; it’s completely tailored for you.
Better Performance, Control, and Security
With dedicated servers, you can run intensive workloads without concern. You choose the operating system, software stack, and configurations. You can focus on just one machine, and so, your applications and data become easier to secure. This is one of the reasons dedicated servers are preferred by businesses that need robust, complex regulatory compliance and complete administrative control.
When Do You Need One?
In any of the following cases, dedicated servers are the most suitable solution:
- Websites with high volumes of traffic, especially where slow response time is not acceptable.
- Business software or SaaS applications with a need for guaranteed, uninterrupted operations.
- Gaming applications that require fast server response time with minimum network latency, ideally under a few milliseconds.
- AI or ML applications that run with heavy computing resources.
- Enterprise applications, especially core databases, data storage, and processes that include personal or sensitive data, including customer records.
If you are starting to feel the limitations of your current hosting, or if you want performance and security management, you are probably ready for a dedicated server.
Choosing the Right Dedicated Server
It is a big shift to go from shared computing resources to dedicated servers, and it is especially important to understand your requirements. Every project is different regarding computing resource requirements for power, storage, and bandwidth. Understanding your requirement is important to make sure you are getting the optimum performance without overspending.
Define Your Purpose
Start by asking yourself: What will I use the server for?
- Website Hosting: If someone is hosting high-traffic or eCommerce websites.
- Gaming: Setting up and running low-latency private and public multiplayer game servers.
- AI/ML Projects: Performing resource-hungry computations needing substantial processing power (CPUs or GPUs).
- Storage & Backup: Secure data storage server solutions.
- Business Applications: Provide server resources required by enterprise applications such as databases, CRMs, and ERP systems.
The nature of the applications you want to run will define the type of hardware, OS, and other custom-tailored performance parameters you will require.
Server Specifications
After defining the intended purpose of the server, you can proceed to the next step, which is identifying the necessary hardware specifications:
- CPU (Cores/Threads): The processor is the server’s core component. The more cores and threads a processor has, the more responsive and quicker the server’s processor will handle multitasking and resource-hungry operations, such as video processing and AI.
- RAM: Having enough memory is necessary to ensure optimal performance. A basic site will require 8–16 GB, whereas enterprise applications, relational databases, or even AI models will demand 64 GB or more.
- Storage:
- SSD – Quick and dependable; best for websites and applications.
- NVMe – Fastest integrated storage option; best for AI/ML applications and high-performance tasks.
- HDD – Large storage capacity at a lower cost, best for backups or archival data.
- Bandwidth & Network Speed: Optimal performance and high-quality user experience are possible due to robust bandwidth, which allows servers to manage high traffic volumes. For heavy traffic or media streaming, seek unmetered or high-capacity bandwidth.
Location Matters
The Location of your server matters. Latency is reduced, and load times are faster when a data center is closer to your audience. Thus, user experience is more favorable. Global companies should work with a service provider that has more than one location to provide data centers.
Comparing Providers
Not all hosting services are the same. Comparing the following factors before a selection is crucial.
- Uptime SLA: Ensure that they offer a minimum of 99.9% uptime.
- Support: 24/7 technical support is one of the requisites for the quick dispatch of help.
- Flexibility: As your needs weigh, ensure that you can readily reallocate or change your plan.
- Reviews & Reputation: Evaluate honest reviews to prevent unreliable service providers.
The ideal dedicated server hosting should be in a location to meet your current needs and also allow for future expansion. Purpose, hardware requirements, server location, and provider reliability are all-important factors to consider for long-term success.
Preparing for Setup
This is the groundwork for your server environment. If done properly, it provides huge benefits in terms of time-saving and avoiding mistakes, costly downtimes, or data loss in the future.
1. Gather Requirements
Start by gathering the following:
- Domain Name
In the case you wish to host websites, applications, or emails, you will need a registered domain. This will eventually be linked to your server’s IP address, and your domain will be configured in your server’s DNS settings. This guarantees your services will be available online with no lag. - IP Address
Your hosting company will provide you with one or more dedicated IP addresses, which you will need for the following:
- Secure Shell or Remote Desktop Protocol (RDP) connections for remote server access.
- Web hosting and SSL certificate serving.
- Email services (especially reverse DNS-enabled email services). Make sure you keep these IP addresses documented to avoid confusion during the configuration phase.
- Provider Credentials
Access credentials (username, password, or API keys) for your hosting provider’s control panel are vital. You’ll need these to:
- Reboot and shut down the server.
- Mounting installation ISOs so you can set up the operating system.
- When the OS becomes unresponsive, enter recovery or rescue mode.
Tip: For security purposes, use a password manager instead of a plain-text document.
2. Access Methods
Before you start managing dedicated servers, you should know all the different access methods available to you. If your servers crash, these access points can save you.
- IPMI (Intelligent Platform Management Interface)
- Provides hardware-level control, independently of the operating system.
- Lets you mount ISO files, monitor the hardware, and power cycle the server.
- Useful if the OS crashes or becomes inaccessible.
- KVM Console (Keyboard, Video, Mouse over IP)
- Works as if a keyboard and monitor were plugged directly into the server.
- Great for troubleshooting boot failures, kernel panics, or driver issues.
- Often included in enterprise-grade hosting services.
- Provider Dashboard / Control Panel
- A web-based portal offered by most hosting providers.
- Common features include rebooting, reinstalling the OS, DNS setup, and monitoring bandwidth or CPU usage.
- Often, the easiest way for a beginner is to manage basic tasks.
Tip: Always test each access method once before installation to avoid figuring it out during a catastrophic failure.
3. Backup Before Setup
A backup serves as a temporary safety net that guarantees your important server data won’t be lost. Even if everything goes wrong, you will still quickly recover.
- Snapshot Backups
The hosting providers offer a snapshot feature. Allocated time to take a snapshot of your server before major installs or configuring your server, which captures all installation server states. In the event of an installation failure, you can return to your snapshot backup to recover the previous server states with a single click. - Rescue Images
A rescue image permits you to boot into a minimalistic Operating System, which allows you to troubleshoot, repair, or recover valuable data from your server. - Migrating from Another Server?
If you are upgrading to a new dedicated server from an old server:- Backup all of the website files along with the databases and configurations.
- Export the email accounts and DNS zone files if they are relevant.
- Test your backup locally to ensure that there are no corrupted files.
Tip: Always test the restore process. A backup won’t be of any help if you can’t restore it when the time comes.
Why This Step Matters
There will always be an unnecessary amount of troubleshooting, loss of data, and downtime if you don’t prepare. Setting up the required files, knowing how to access your backup server, and configuring your server are all steps to establishing a stable foundation.
A well-executed setup process will guarantee a safe, secure, and predictable workflow.
Installing the Operating System
After provisioning your dedicated server and gaining access to it, the first step is to install the operating system (OS). The OS is the basis on which everything else is built, including web servers, databases, monitoring tools, security tools, and configurations. The choice of OS and the initial setup of it dictate the server environment’s performance, security, and flexibility.
1. Choosing the Right OS
The operating system you install depends on your applications, your technical knowledge, and your business objectives. The primary options will generally come down to Linux and Windows Server.
Linux Distributions (Ubuntu, CentOS, Debian, Rocky Linux, AlmaLinux)
- Best for: Web hosting, open-source applications, development environments, and custom server setups.
- Pros:
- Free and open-source (no licensing fees are required).
- Lightweight, stable, and secure.
- Extensive community support and documentation.
- Free to customize for advanced users.
- Popular Distros:
- Ubuntu Server: Easy to use, large community, frequently updated.
- CentOS/Rocky/AlmaLinux: Enterprise-grade stability, often preferred for cPanel hosting.
- Debian: Known for its rock-solid stability, ideal for long-term projects.
Windows Server
- Best for: Microsoft technologies, business, and enterprise applications.
- Pros:
- Integrates seamlessly with ASP.NET, MSSQL, Active Directory, and Exchange.
- Provides support for Windows users with a familiar interface.
- Strong vendor support.
- Cons:
- Licensing costs (monthly or yearly).
- Heavier system requirements compared to Linux.
Linux vs Windows Server
| Feature | Linux (Ubuntu, CentOS, Debian) | Windows Server |
|---|---|---|
| Cost | Free and open-source | Paid license required |
| Best For | Web hosting, apps, developers | Enterprise, Microsoft apps |
| Ease of Use | CLI focused, requires Linux knowledge | GUI friendly, Windows-like |
| Security | Very secure with proper configs | Secure but needs frequent patching |
| Support | Large open-source community | Official Microsoft support |
2. Installation Steps
Once you’ve selected your operating system (Linux or Windows Server), the next step is to install it on your dedicated server. While many hosting providers offer one-click installations via their control panel, it’s important to know the manual process so you understand what’s happening under the hood.
Step 1: Boot from ISO
Most hosting providers give access to IPMI, KVM, or a web dashboard where you can:
- Mount your chosen OS ISO image.
- Reboot the server.
- Enter the boot menu (usually by pressing F11, F12, or Esc during startup).
- Select the virtual CD/DVD drive to boot from the ISO.
Step 2: Partition Disks
Proper partitioning is crucial for performance, security, and backups.
Linux Example (Ubuntu/Debian/CentOS):
During installation, you’ll be asked to partition disks. A recommended scheme is:
- / (root): 20–30GB
- /home or /var: Remaining space for user/app data
- /backup: Optional local backup space
- swap: Typically equal to RAM size (if RAM ≤ 8GB), or half the RAM for larger systems
Manual partitioning with fdisk:
# List disks
lsblk
# Start partitioning (replace /dev/sda with your disk)
sudo fdisk /dev/sda
# Inside fdisk:
# n → create new partition
# p → primary partition
# w → write changes
Format partitions:
sudo mkfs.ext4 /dev/sda1 # root
sudo mkfs.ext4 /dev/sda2 # home/var
sudo mkswap /dev/sda3 # swap
Activate swap:
sudo swapon /dev/sda3
Windows Server Example:
- The installer will show available disks.
- Select the primary disk → choose Custom: Install Windows only (advanced).
- Delete old partitions if necessary.
- Create new partitions → Windows automatically creates System Reserved and Primary.
- Choose the Primary partition for installation.
Step 3: Install the Operating System
Linux (Ubuntu Example)
- Select language, keyboard layout, and installation type.
- Configure hostname and root password.
Configure networking:
# Example: set static IP on Ubuntu
sudo nano /etc/netplan/01-netcfg.yaml
Example configuration:
network:
version: 2
ethernets:
eno1:
dhcp4: no
addresses:
– 192.168.1.100/24
gateway4: 192.168.1.1
nameservers:
addresses: [8.8.8.8, 1.1.1.1]
Apply changes:
sudo netplan apply
- Select software (minimal server or with services).
- Proceed with installation.
Windows Server
- Boot into installer → select Language, Time, and Keyboard layout.
- Enter product key (or trial mode).
- Choose Windows Server (Desktop Experience) if you want GUI, or Server Core for CLI.
- Select target partition and click Next.
- Installer copies files and reboots automatically.
Step 4: Reboot and Verify
Once installation completes, reboot into the new system.
Linux Verification:
# Check OS details
cat /etc/os-release
# Verify network connectivity
ping -c 4 8.8.8.8
# Verify disk usage
df -h
Windows Verification:
- Log in with Administrator credentials.
- Open Server Manager to check roles and features.
Verify network settings:
ipconfig /all
ping 8.8.8.8
- Check storage via Disk Management.
3. Basic Post-Installation Configurations
Installing an operating system is just the first step. During the initial configuration steps, we ensure that the system is secure, stable, and ready for the additional setup.
- Update the System Immediately:
Outdated packages leave your system vulnerable. Run:
- Ubuntu/Debian: apt update && apt upgrade
- CentOS/RHEL/Rocky/AlmaLinux: yum update or dnf update
- Windows: Use Windows Update to install the latest patches.
- Ubuntu/Debian: apt update && apt upgrade
- Create a Non-Root User:
For Linux, never use the root account for everyday tasks. Create a new user with sudo privileges. For Windows, create an Administrator account separate from the default system admin. - Set the Hostname and Timezone:
- Hostname: Assign a meaningful name (e.g., web01.yourdomain.com) for easier server management.
- Timezone: Ensures logs and cron jobs are accurate. Configure with:
- Linux: timedatectl set-timezone Region/City
- Windows: Control Panel > Date and Time settings.
- Linux: timedatectl set-timezone Region/City
- Hostname: Assign a meaningful name (e.g., web01.yourdomain.com) for easier server management.
- Configure Networking:
- Assign a static IP address.
- Set up DNS resolvers for reliable name resolution.
- Test connectivity with ping or tracert.
- Assign a static IP address.
- Install Essential Packages/Drivers:
- Linux: Tools like curl, wget, htop, nano/vim for convenience.
- Windows: Install any missing drivers or Microsoft management tools.
- Linux: Tools like curl, wget, htop, nano/vim for convenience.
4. Next Steps
Your dedicated server has a clean and properly configured operating system. Next, focus on:
- Security (firewall configuration, SSH hardening, and intrusion prevention).
- Installing server roles and applications (web server, database server, email server, etc.).
- Reliability through monitoring and backups.
Your meticulous choice and configuration of the operating system provides a stable foundation for everything else to come: the stability, performance, and security of your dedicated server are in good hands.
Securing Your Dedicated Server
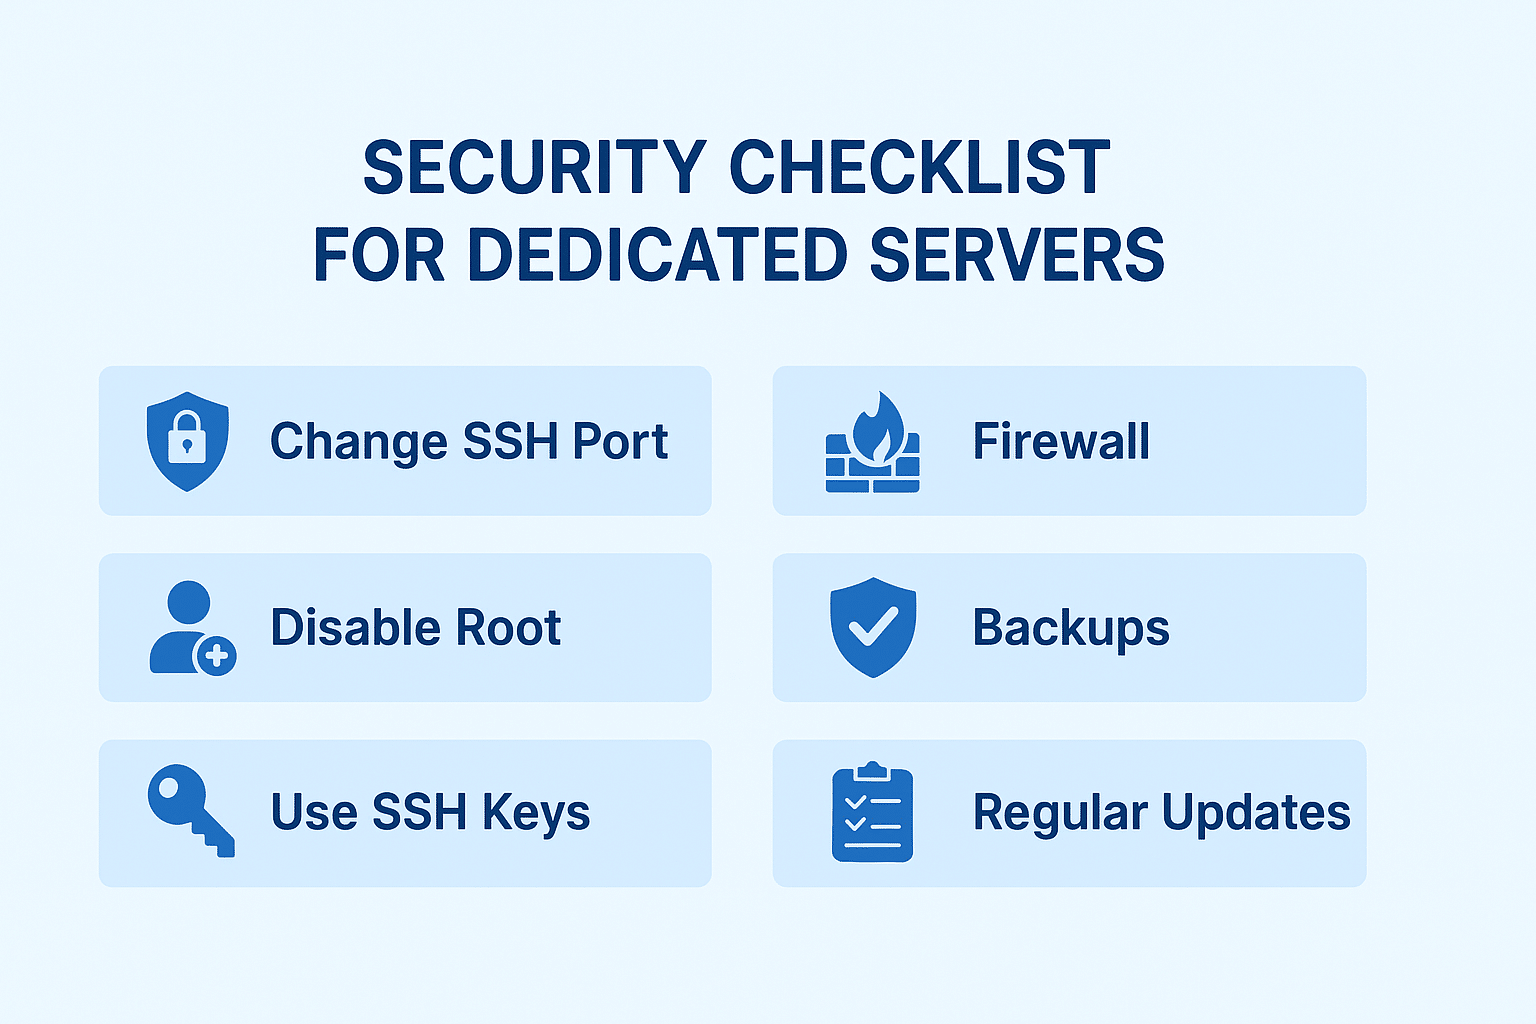
While all elements of setting up a dedicated server are important, none are as crucial as security. Given that a dedicated server is perpetually online, it will be scanned for security vulnerabilities, targeted by hackers, attacked by malware, or defended by automated bots. A single access point could result in a server being taken offline, exposing confidential information, or a fully compromised server. Because of this, robust security measures will defend the infrastructure and the owner’s trust, and the data of users will be secure
1. Access Security
Controlling how users access the server is the first principle in server access security. Weak and default methods of entry login provide the most common path for security attacks.
- Change the Default SSH Port:
While the SSH login runs on port 22, malware attacks are endlessly brute-forcing this port. No, changing it to a non-standard port like 2222 or 2200 will not prevent focused attacks, but it will help get rid of automated shifting attacks. - Disable Root Login:
The root account has full administrative privileges, making it a prime target. Disable direct root login and instead use a non-root account with sudo privileges. This adds an extra step that protects against unauthorized access. - Use SSH Keys for Authentication:
There is a slimmer chance of brute-forcing an SSH key in comparison to a password. To create a passwordless system, generate a key pair, upload your public key to the server, and turn off password-based authentication entirely. - Restrict Access by IP (Optional):
As an additional method to enhance security, set your firewall to only allow SSH access from specified IPs (for instance, your office network)
2. Firewall Setup
A firewall filters traffic, blocking undesired connections and streams, and letting only legitimate traffic flow. Firewalls help to protect your server from various threats, including scans, malware, and brute-force attacks.
- For Linux Servers:
- UFW (Uncomplicated Firewall): Suitable for beginners and very popular on Ubuntu and Debian systems.
- iptables/nftables: More advanced and provides customizable fine-grained control on traffic.
- For Windows Servers:
- Set Windows Firewall with custom rules and create inbound and outbound rules.
- Block unnecessary ports, and restrict access to only the needed ones, like 80 and 443 for web traffic and your own SSH/RDP ports.
3. Install Protection Tools
Although a firewall is a security server’s first line of defense, additional protective software can help to mitigate malicious activities by proactively detecting and preventing them.
- Fail2Ban: Keeps track of failed logins and temporarily bans IPs showing abusive behavior. Crucial for SSH and FTP, as well as other exposed services.
- CSF (ConfigServer Security & Firewall): One of the most used security solutions for Linux. It integrates and provides Firewall and security features, including login tracking, process tracking, and intrusion detection.
- IDS/IPS (Intrusion Detection & Prevention Systems):
- For network-based Intrusion detection, use Snort or Suricata, which can process traffic in real time and determine if there are any security issues.
- OSSEC gives host-based intrusion detection and security by checking logs for suspicious activity.
4. Regular Updates & Patching
Ignoring updates is, hands down, the most detrimental thing a server admin can do. Stale software is a hacker’s best friend.
- Keep the Operating System Updated: Run apt update && apt upgrade (Debian/Ubuntu) or yum update (CentOS/RHEL) regularly.
- Update Control Panels: Tools like cPanel, Plesk, or Webmin often release security patches — install them promptly.
- Patch Applications & Services: Web servers (Apache/Nginx), databases (MySQL/PostgreSQL), and email servers must always be updated to the latest stable versions.
- Automate Security Updates: Configure unattended upgrades for security patches to minimize manual work.
Tip: Always test updates in a staging environment first to avoid breaking production services.
5. Backup & Redundancy Strategy
Even secure servers can experience hardware failures, accidental deletions, or data corruption. Backups are your safety net.
- Automated Backups: Set your system to automatically save backups of user data along with system configurations daily or weekly
- Off-Site or Cloud Storage: Always keep backups in a safe, remote location, such as Amazon S3, Google Cloud, or other data centers. Backups stored only on the same server are next to useless, as server failures can occur.
- Test Restores: Regularly evaluate your system and run restore tests to ensure your backups will work when needed.
- Redundancy with RAID:
- RAID 1 (Mirroring): Protects against single-disk failures.
- RAID 10: Offers both performance and redundancy.
- RAID 1 (Mirroring): Protects against single-disk failures.
- Failover Servers: For mission-critical workloads, consider replication or load balancing to switch automatically to a backup server if the primary fails.
Tip: Follow the 3-2-1 rule: 3 copies of your data, 2 different types of storage, 1 of them remote.
Securing a dedicated server is not a one-time setup, but an ongoing process. By implementing strong access controls, firewalls, and reliable backups, along with intrusion detection and regular patching, you form a multi-layered defense system.
Consider how apprehensive a user would be about a dedicated server that frequently goes offline or freezes during tasks. Follow safe practices, and your virtual server will earn a remarkable reputation and admirable reliability for your projects and users. For this reason, remember that your server is only as strong as its weakest link. Being proactive, frequently updating, and checking logs are effective strategies.
Configuring Essential Services
After securing your dedicated server, the next step is configuring the essential services that make it fully functional for hosting websites, applications, or business workloads. These services are the foundation of your server’s operations, and each one must be carefully set up for reliability, security, and performance.
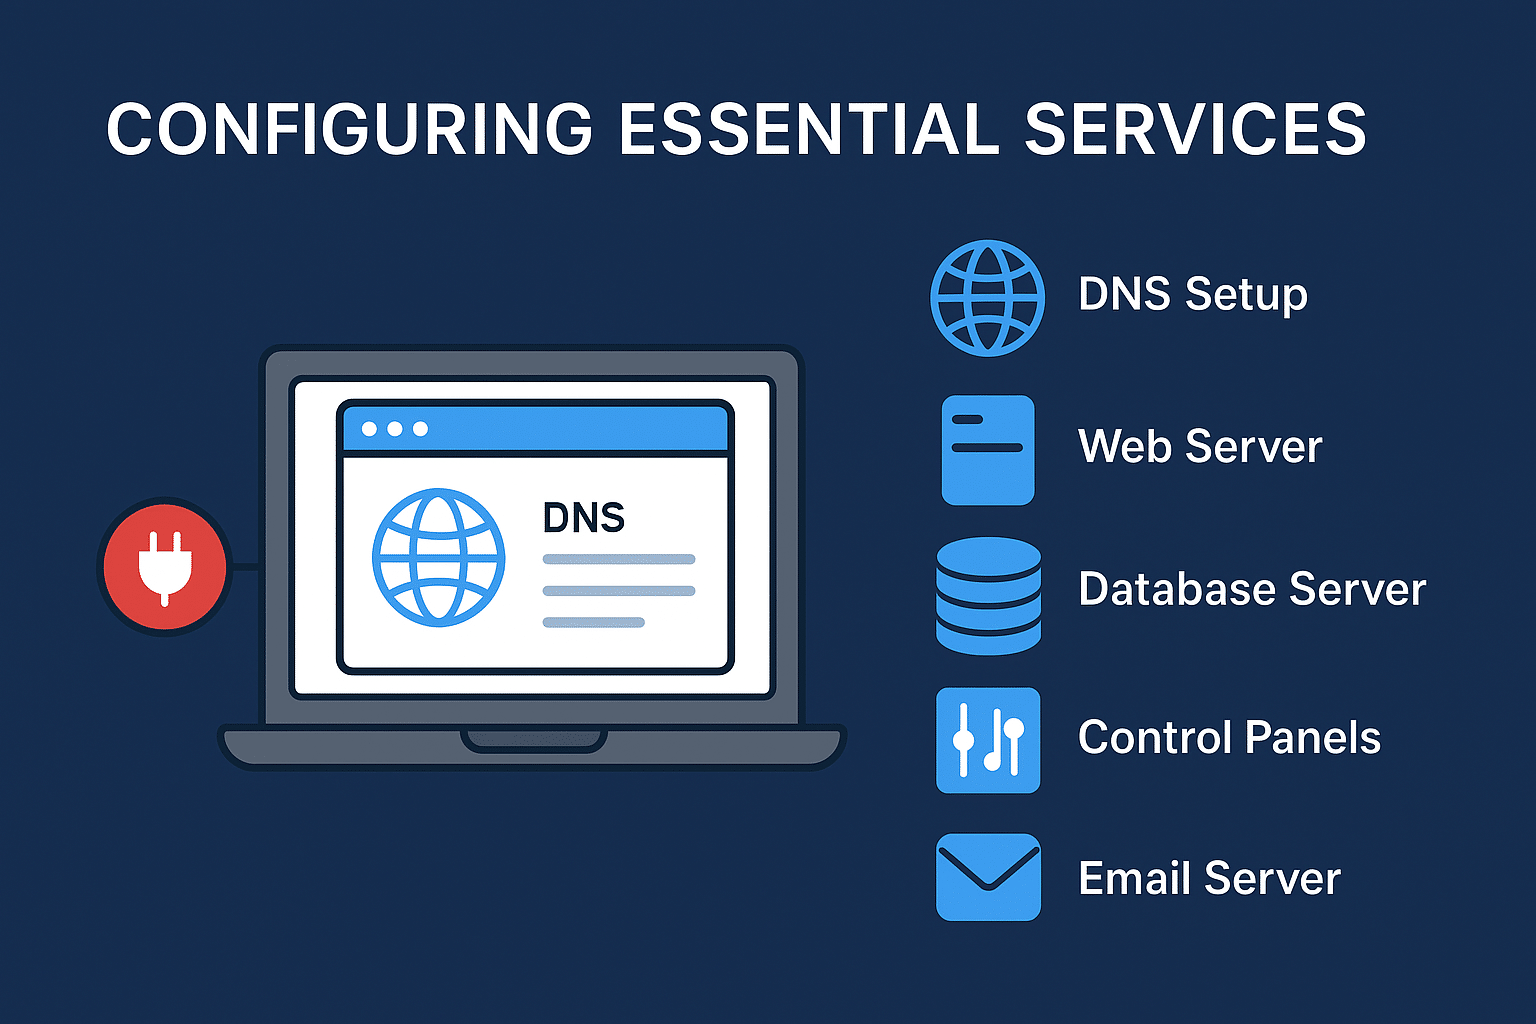
1. DNS Setup: Connecting Your Domain
Without DNS, users would need to type your server’s IP address to reach your site — not very practical. DNS (Domain Name System) maps your domain name (e.g., example.com) to your server’s IP address.
Steps to configure DNS:
- Log in to your domain registrar’s DNS panel (e.g., GoDaddy, Namecheap, Cloudflare).
- Create an A record pointing your domain (and subdomains like www.example.com) to your dedicated server’s IP address.
- If you’re running an email server, configure MX records for mail delivery and PTR (reverse DNS) records for verification.
- Add CNAME records (aliases) for subdomains or services.
- Use TTL (Time to Live) values wisely, shorter TTLs for frequently updated records, longer TTLs for stable entries.
Best practices:
- Use a managed DNS provider like Cloudflare, Amazon Route 53, or your host’s DNS tools for reliability and DDoS protection.
- Always configure redundant DNS servers to prevent downtime.
- Enable DNSSEC (Domain Name System Security Extensions) for added protection.
2. Web Server Installation
The web server is the software that handles incoming HTTP/HTTPS requests and serves content to users.
Popular options:
- Apache HTTP Server:
- Pros: Highly compatible, extensive modules, great for complex apps.
- Cons: Slightly heavier on resources under high traffic.
- Pros: Highly compatible, extensive modules, great for complex apps.
- Nginx:
- Pros: Lightweight, fast, ideal for handling thousands of concurrent connections.
- Cons: More complex configuration compared to Apache.
- Pros: Lightweight, fast, ideal for handling thousands of concurrent connections.
- LiteSpeed:
- Pros: Built-in caching, excellent performance, and strong WordPress optimization.
- Cons: Commercial license required.
- Pros: Built-in caching, excellent performance, and strong WordPress optimization.
Installation overview (Linux example):
# For Apache
sudo apt update
sudo apt install apache2
# For Nginx
sudo apt update
sudo apt install nginx
Best practices:
- Always enable HTTPS using SSL/TLS (e.g., Let’s Encrypt).
- Use Gzip or Brotli compression to reduce bandwidth usage.
- Implement rate limiting to prevent DDoS or brute-force attacks.
3. Database Server
Databases power most dynamic websites and applications by storing and retrieving data.
Options to consider:
- MySQL: The go-to for CMSs like WordPress, Joomla, and Drupal.
- MariaDB: A drop-in replacement for MySQL, faster and community-driven.
- PostgreSQL: More advanced features for large-scale or enterprise applications.
Installation example (Linux):
# MySQL
sudo apt update
sudo apt install mysql-server
# MariaDB
sudo apt update
sudo apt install mariadb-server
# PostgreSQL
sudo apt update
sudo apt install postgresql postgresql-contrib
Best practices:
- Set strong passwords for root and user accounts.
- Restrict database access to localhost unless remote access is absolutely necessary.
- Schedule automated backups and test recovery regularly.
- Monitor database performance using tools like phpMyAdmin, Adminer, or pgAdmin.
4. Control Panels for Easier Management
Not everyone is comfortable managing servers through the command line. Control panels provide a GUI (Graphical User Interface) for easier server administration.
Popular choices:
- cPanel/WHM: Paid, user-friendly, widely used in web hosting.
- Plesk: Works on Linux and Windows, modern interface.
- Webmin/Virtualmin: Free, open-source, lightweight, good for smaller setups.
Why use them?
- Simplifies tasks like creating websites, managing DNS, setting up email, and monitoring security.
- Useful for beginners and small businesses who want fast setups without deep technical knowledge.
Note: Control panels consume resources and may limit flexibility compared to command-line setups. Choose wisely based on your expertise.
5. Email Server Setup
If you want your dedicated server to handle email, you need to configure a Mail Transfer Agent (MTA).
Options:
- Postfix: Popular on Linux, secure, and reliable.
- Exim: Another flexible MTA, often preinstalled on cPanel servers.
- Microsoft Exchange: Enterprise-grade, ideal for Windows Server.
Steps to ensure email deliverability:
- Configure MX records in your DNS.
- Set up SPF, DKIM, and DMARC records to prevent spam flagging.
- Add reverse DNS (PTR records) to match your mail server IP with your domain.
- Enable TLS encryption for secure communication.
Best practices:
- Monitor your server’s IP reputation (avoid being blacklisted).
- Consider outsourcing email to services like Google Workspace or Microsoft 365 if reliability is critical.
6. Performance Optimization
Even with everything running, you must optimize your server for speed and efficiency.
Key strategies:
- Caching:
- Use Varnish Cache for web acceleration.
- Redis or Memcached for database query caching.
- Use Varnish Cache for web acceleration.
- RAID Setup:
- RAID 1: Redundancy (mirroring).
- RAID 10: Balance of performance and fault tolerance.
- RAID 1: Redundancy (mirroring).
- Server Tuning:
- Adjust Nginx worker processes for concurrency.
- Increase MySQL buffer pool size for faster queries.
- Enable HTTP/2 or HTTP/3 for faster page loading.
- Adjust Nginx worker processes for concurrency.
- Load Balancing:
- Distribute traffic across multiple servers using HAProxy or Nginx load balancer.
Best practices:
- Use a CDN (Content Delivery Network) like Cloudflare or Akamai to reduce latency.
- Continuously monitor performance with tools like GTmetrix or New Relic.
- Review logs regularly to spot bottlenecks.
Configuring essential services transforms your dedicated server from just a secure machine into a fully functional hosting environment. By properly setting up DNS, web and database servers, email systems, and optimizing performance, you ensure a fast, secure, and scalable infrastructure.
The goal is not just to get your server running but to make sure it operates efficiently and can handle growth without disruption.
Ongoing Management & Monitoring
Setting up your dedicated server is only the beginning. To keep it running smoothly, you’ll need to continuously monitor performance, apply updates, and plan for future growth. Ongoing management ensures your server stays secure, reliable, and optimized for your workload.
Monitoring Tools
Server monitoring helps you keep track of system health, resource usage, and potential issues before they impact performance. Some popular tools include:
- Nagios: A powerful, widely used monitoring system for networks, servers, and applications.
- Zabbix: An open-source solution with real-time monitoring and alerting.
- Grafana: Great for visualizing performance data with dashboards, often used alongside Prometheus.
These tools can monitor CPU, memory, disk usage, uptime, and even network traffic.
Setting Up Alerts & Logs
Being proactive is key to server management.
- Alerts: Configure email, SMS, or dashboard alerts to notify you when resources are overused or when downtime occurs.
- Logs: Keep system and application logs organized and monitored. Tools like Logwatch or ELK Stack (Elasticsearch, Logstash, Kibana) help analyze logs for errors or suspicious activity.
Regular Security Maintenance
Security is an ongoing task, not a one-time setup.
- Run vulnerability scans to identify weaknesses in your system.
- Harden services by disabling unused ports and protocols.
- Review firewall rules and access controls regularly.
- Rotate SSH keys and update passwords periodically.
Scaling Your Dedicated Server
As your business or application grows, you may outgrow your current setup. There are two main ways to scale:
- Vertical Scaling (Upgrading Hardware): Add more RAM, faster CPUs, or larger storage.
- Horizontal Scaling (Load Balancing): Distribute traffic across multiple servers for better redundancy and performance.
Planning ahead for scaling ensures smooth growth without downtime.
Routine Maintenance
To keep your server in top condition, schedule regular maintenance tasks:
- Updates: Apply operating system and software patches promptly.
- Reboots: Reboot periodically after updates or configuration changes.
- Backup Verification: Don’t just back up, test your backups regularly to ensure they can be restored when needed.
Proactive management and consistent monitoring are what keep a dedicated server reliable for the long term. With the right tools, alerts, and scaling strategy, your server can continue to support your workloads as they evolve.
Best Practices for Dedicated Server Management
Handling a dedicated server starts with environment setup and securing the server. Once a server starts running, the real test is keeping the server stable, secure, and optimized. If the server is managed poorly, it can lead to unscheduled downtime, security breaches, and performance bottlenecks. Following the best server management practices helps to mitigate those risks and increase efficiency, ultimately easing server operations.
1. Document Server Configurations
Proper documentation is one of the most poorly executed best practices. For server setup and management, make sure to keep a record of:
- The server hardware specifications: CPU, RAM, storage type, and bandwidth limits.
- The control and application software versions, and the configured firewall and security policies.
- The maintained DNS records, the settings of the domain, and the user accounts with their access rights.
If the issue is documented thoroughly, it will save you time and frustration instead of trying to remember what you changed. It will also streamline the onboarding process for new staff and serve as a reference for troubleshooting and audits.
Pro tip: For best documentation practices, consider using Confluence, Notion, or GitHub Wiki.
2. Use Version Control for Critical Configs
As a server’s configuration file, it determines how everything operates, including the web server, the database, and the applications. For your service to run, a configuration file must be intact, and a slight change may cause everything to shut down.
Keeping configuration files on Git for version control offers:
- A record of changes
- The opportunity to return to a safe/working version if needed
- Integrated collaboration to explain changes and the reasons for those changes
This is important in team environments, where server admins and/or developers update the server simultaneously. Version control minimizes the risks of misconfigurations and promotes accountability.
3. Test Before Applying Major Changes
Many admins fail to test updates and changes before applying them to live production servers. Yes, changes and updates must be made, but sometimes they bring bugs or other issues.
To limit the risk of downtime:
- Build a staging environment that duplicates your production setup.
- Test updates, new services, and configuration changes on it.
- After testing, implement the changes during a low-traffic time.
This kind of practice minimizes risks significantly. Unplanned service disruptions are prevented, saving your time and keeping your users and business operational.
4. Automate Repetitive Tasks Where Possible
Not only does repetition waste time, but it can be harmful. Automating certain processes can remove a certain degree of unpredictability and unreliability from a server environment.
Some tools you can use are:
- Ansible, Puppet, and Chef for automated configuration management and deployment
- Cron jobs and scripts for automated backups, log rotation, and other system cleanups
- CI/CD pipelines for seamless application deployment
Even simple automations, like a chatbot for answering simple customer queries, can deliver valuable time-saving results. As an illustration, automation of a daily script that checks and reports disk usage can avert a server crash due to an overflowing disk.
Why Best Practices Matter
Best practices provide an excellent base to manage your dedicated server, thus helping you to:
- Ensure a higher degree of reliability
- Improve security and compliance
- Decrease repetitive work and your time for tasks
- Effectively, automate tasks for scaling your structure
Taking a proactive approach will give you a dedicated server that’s secure, efficient, and easy to manage.
Conclusion
At first, the process of configuring your own dedicated server may seem complicated. However, when properly planned out, the process can be simplified. The journey begins with determining what type of server aligns with your requirements, followed by operating system installation, environment securing, configuring necessary services, and configuring the apps. After that, routine checks, maintenance, and adherence to defined procedures will allow the server to run well and with optimum efficiency.
The vital principle to note is that server maintenance, including security, is vital. Without effective access controls, your system will be weak and will leave your data and users vulnerable. Trust and data protection will be lost without maintenance and strong backup enforcement.
Setting up a dedicated server becomes easier with the right steps and practices. ProlimeHost is here to provide secure, reliable, and scalable hosting solutions to support your growth and success.
FAQs
What is a dedicated server, and how is it different from shared or VPS hosting?
A dedicated server is a physical server entirely reserved for one user or organization. Unlike shared hosting, where multiple users share the same resources, or VPS hosting, where resources are divided virtually, a dedicated server provides full control, better performance, and enhanced security.
Do I need technical knowledge to set up a dedicated server?
Yes, some technical knowledge is required to handle installation, configuration, and maintenance. However, many providers offer managed dedicated server options where experts handle most of the technical tasks for you.
Which operating system should I choose for my dedicated server?
It depends on your needs. Linux distributions like Ubuntu, CentOS, or Debian are best for websites, applications, and open-source projects. Windows Server is ideal for enterprise software and applications that require Microsoft technologies.
How do I keep my dedicated server secure?
You can secure your server by changing default login credentials, using SSH keys, enabling firewalls, keeping the OS updated, installing intrusion prevention tools, and setting up automated backups.
Can I upgrade my dedicated server later as my needs grow?
Yes. Dedicated servers can be scaled by upgrading hardware (CPU, RAM, storage) or by adding load-balancing solutions. This ensures your server continues to perform well as your traffic and workloads increase.


